Forcing bulbs indoors isn’t difficult, but it does require proper timing. Forced bulbs make beautiful…
Succulents planters are easy to create, easy to care for, and make a fantastic gift or centerpiece for the season of haunts. Learn how to make your own here.
How-To: Halloween Succulent Planters
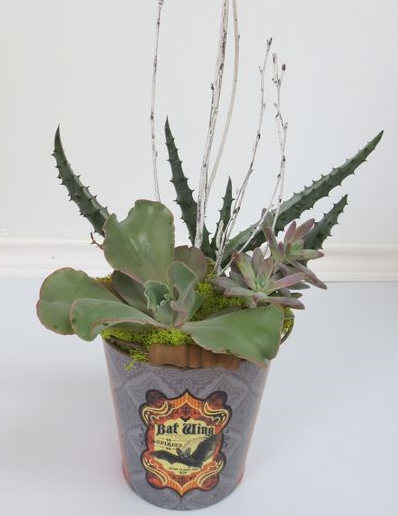
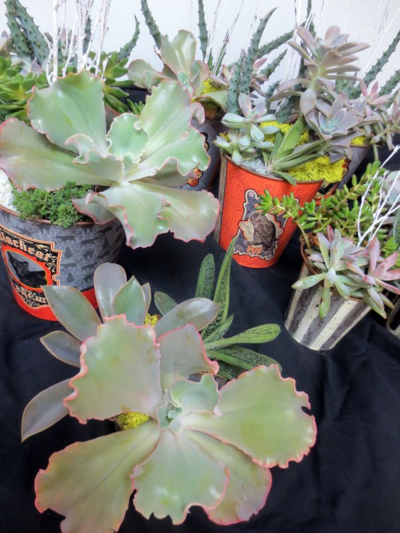
If you’re looking to create something unique this Halloween season, give these fun little succulent planters a try. They’re easy to create, easy to care for, and make a fantastic gift or centerpiece for the season of haunts!
We love the versatility and ease of creating with succulents; their low water demands and inherent ability to withstand tough conditions makes them ideal for rock gardens, planters, vertical gardens and more–really, your creativity is your only limit!
We found these fantastic vintage-inspired Halloween bucket cachepots and jumped at the chance to bring them in for the store. They’re artistic and the unique designs create a great composition, even before planting.
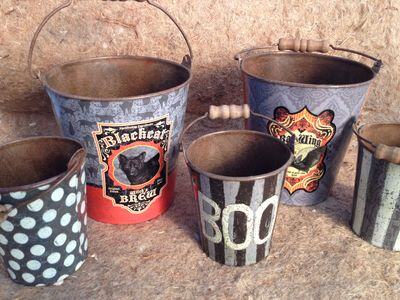
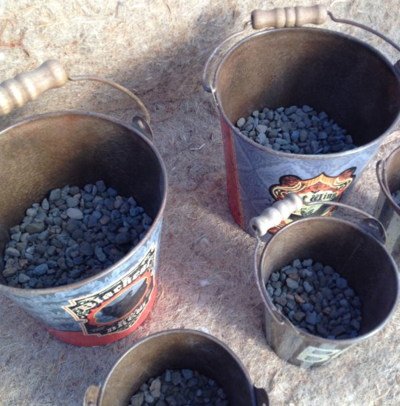
First, it’s important to emphasize that these don’t have drainage holes, and succulents require excellent drainage. They’re ideal as cachepots–drop in decorative containers for potted plants–or you can use gravel or even drill them and use a drainage dish. Here, we’ve filled them halfway with expanded shale to provide drainage space (you will still need to be cautious not to overwater).
Select succulents that have varying textures, forms and colors for the best composition. Combine both fine-textured kinds with small leaves, like Sedum, with broad-textured kinds with large leaves, such as Echeveria and Aloe.
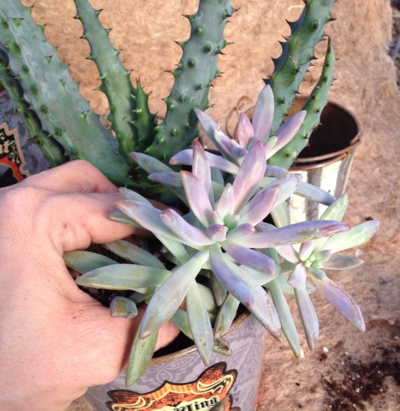
We began with the bold, architectural form Monster Aloe, Aloe monstruosa–apropos, isn’t it?

The spiny, warty texture of this Aloe makes it especially perfect for a Halloween-themed container, and its bold, upright form makes the perfect ‘thriller’ for this composition. To this, we add contrasting but complimentary textures, including this ghostly pale Pachyphytum:
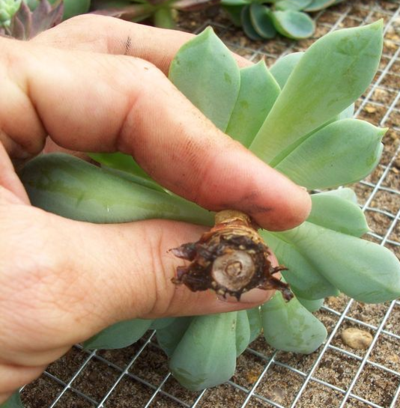
Use pieces and cuttings of different succulents to fill all the little gaps around your main plant–this creates a more naturalized and interesting composition. When using cuttings, it’s important to remember that they’ll need to callous over before being inserted into soil. To do this, simply snap or slice off stem pieces and allow them to dry in a sheltered space until the cut end is dried:
Continue until you’re pleased with your composition, then carefully add small amounts of soil and be sure to fill any gaps between the plants. We also added a thin layer of expanded shale to help keep the surface of the soil tidy. Now, for the fun part!
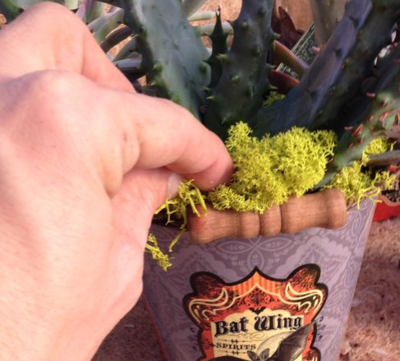
Add your own decorative accents to set your creation apart: we began with chartreuse reindeer moss with a fluffy, pillowy texture. It works best when you pinch a few pieces together to create an insertion point, and use your fingertips or chopsticks to insert these into small spaces between the succulents:
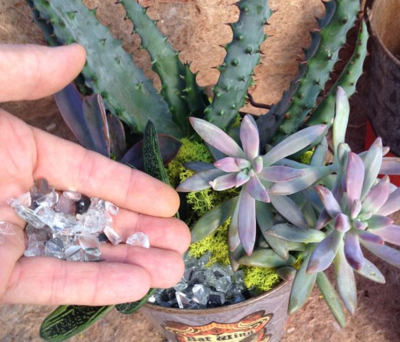
We left a few small spaces to add a bit of shine with this tumbled, recycled glass and mirror mulch. We love the effect!
Lastly, we added a few painted birch branch twigs to add a bit more height and ‘bone-like’ texture.
All finished! Remember, keep watering very light unless you’ve opted to punch holes in your bucket for drainage. A light watering every 2-3 weeks will suffice, especially if it’s kept indoors. As the plants grow, simply pinch them back and use the pieces you remove to propagate the plants for your next creation!
To see our scheduled classes on creating different types of containers throughout the year, see our events page at nhg.com/events and follow us on Facebook at facebook.com/northhavengardens.
